


The video gives a step by step tutorial on how to replace the water pump, all belts and the shaft seals on a Porsche 944 S2.
The repair is shown for a S2, but most steps are the same for other models of the 944. The belts have to be replaced every 8 years or 80000 km, whatever comes first. The water pump and shaft seals should be replaced at each second replacement of the timing belt.
Warning
- This is not a repair for a beginner. You should know at least how to perform a normal service for this car.
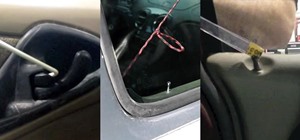
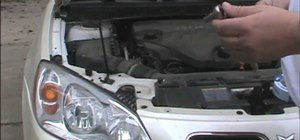
Step 1 Preparations on the upper side
- Disconnect the battery.
- Disconnect the plug wires from the distributor.
- Remove the distributor cap.
- Remove the upper cover of the timing belt.
- Remove the cover of the camshaft sprocket.
- Dismount the rotor. Don't lose the distance rings.
- Lock the sprocket by three M5x20 bolts to save the timing.
- Open the bleed plug of the cooling system.
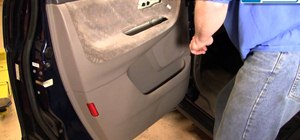
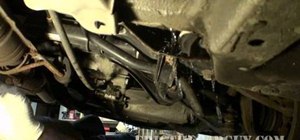
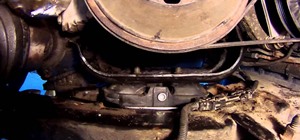
Step 2 Preparations on the lower side
- Remove the engine's undercover.
- Dismount the lower part of the bumper.
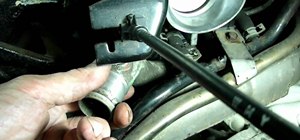
- Take out the large hose between the water pump and the radiator.
- Disconnect the hose coming from the reservoir from the pump.
- Remove the plastic housing under this hose from the pump.
- Unmount the heating hose from the pump.
- Unplug and remove the cooling fans.
- Disconnect the cables from the starter motor.
- Remove the starter motor.
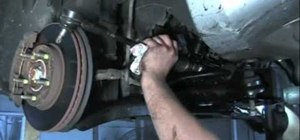
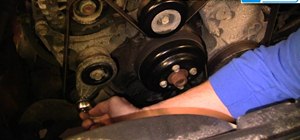
Step 3 Removing the belts
- Lock the flywheel by an Allen key in one of the bolts.
- Slacken the central bolt in the crankshaft.
- Loosen the power steering pivot bolts.
- Loosen locknuts of the pressure rod. Be careful - the left side has a left thread.
- Turn the pressure rod until it is possible to remove the belt.
- Hang up the pump and remove the pivot bolt. The pump can be taken out sideways.
- Loosen the generator pivot bolts.
- Loosen locknuts of the generator's pressure rod. Be careful - the left side has a left thread.
- Remove the lower cover of the timing belt.
- Loosen the tensioner of the balance shaft's belt and take the belt out.
- Remove the idler of the balance shaft's belt.
- Dismount the tensioner of the balance shaft's belt.
- Crank the engine until TDC is reached.
- Remove the central bolt of the crankshaft and the pulley for the drivebelt.
- Remove the alternator pulley, which is fixed by 4 bolts.
- Loosen the nut and bolt of the tensioner.
- Turn the tensioner with the special pin spanner against the spring and fix the bolt.
- Lift the belt off the camshaft sprocket.
- Remove upper idler.
- Remove lower idler from the tensioner.
- Using a puller, dismount the sprocket for the balance shaft's belt.
- Remove the securing clip.
- Before dismounting the tensioner, release the tension.
- Remove the 3 nuts of the tensioner and take the tensioner off.
- Take the timing belt out of the engine.
- Lock the sprocket of the upper balance shaft by the special pin spanner while loosening the central bolt.
- Mark the relation of the sprocket to the shaft.
- Pull the sprocket of the upper balance shaft.
- Lock the sprocket of the lower balance shaft by the special pin spanner while loosening central bolt.
- Mark the relation of the sprocket to the shaft.
- Pull the sprocket of the lower balance shaft.
- Remove the backside cover of the timing belt.
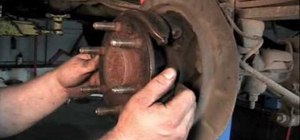
Step 4 Tightening the crankshaft
- Use a puller for removing the sprocket of the timing belt.
- Remove the key from the crankshaft.
- Remove the distance plate.
- Insert a screwdriver under the inner edge of the seal and pry it out.
- Remove the O-ring and the sleeve.
- Push the new seal in the sleeve and tap it fully into the oil pump.
- Tap in the seal of the crankshaft.
- Install a new O-ring and put the distance plate back.
- Install a new key in the crankshaft.
Step 5 Tightening the upper balance shaft
- Pry the key out of the balance shaft with a screwdriver.
- Remove the front housing of the upper balance shaft. If necessary use a puller.
- Insert a screwdriver under the inner edge of the seal and pry it out.
- Remove the spacer and search the thin seal. It is either on the spacer or it remains on the shaft.
- Slide the thin seal very carefully on the shaft.
- Replace the support O-ring, and place the front housing.
- Coat the spacer with MoS2 grease and put it on the shaft.
- Tap the seal into the bore with a wooden tool.
- Fasten the bolts of the front housing with 20 Nm.
- Install the key with the round side to the center of the shaft.
Step 6 Tightening the lower balance shaft
- Pry the key out of the balance shaft with a screwdriver.
- Unlock the 3 bolts on the front side of the housing.
- Unlock the bolt on the backside of the housing.
- Dismount the housing.
- Insert a screwdriver under the inner edge of the seal and pry it out.
- Remove the spacer and search the thin seal. It is either on the spacer or it remains on the shaft.
- Slide the thin seal very carefully on the shaft.
- Change the support O-ring, and place the front housing back.
- Coat the spacer with MoS2 grease and put it on the shaft.
- Tap the seal into the bore with a wooden tool.
- Fasten the bolts of the front housing with 20 Nm.
- Install the key with the round side to the center of the shaft.
- Put back the power steering pump on the pivot.
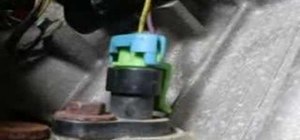
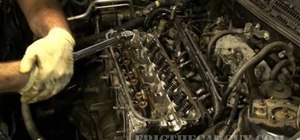
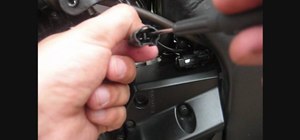
Step 7 Replacing the water pump
- Be very careful when loosening the bolts and nuts of the water pump. Unlock the bolts from inside to outside and note their positions.
- Take out the water pump.
- Dismount the thermostat with the help of special pliers for the snap ring.
- Some pumps may have special guides which don't fit to any engine. If it's not fitting, remove the guides.
- Mount the new thermostat to the pump.
- Remove the old gasket soundly by using a copper tool.
- Install the pump. Use gasketing in addtion to the paper gasket.
- Fasten the bolts from inside to outside in several steps. The final momentum should be 8 Nm.
- Connect the heating hose.
Step 8 Mounting the camshaft and balance shaft belts
- Install backward cover of timing belt.
- Add the sprocket for the crankshaft.
- Place the sprocket of the upper balance shaft. A little impact helps to install it.
- Add the collar and place the bolt. The positioning is in the right for the upper balance shaft when you see the "o" in the large hole.
- Lock sprocket with the pin spanner and fasten bolt by 45 Nm.
- Place the sprocket of the lower balance shaft.
- Add the collar and place the bolt. The positioning is in right for the lower balance shaft when you see the "o" in the small slit.
- Lock sprocket with the pin spanner and fasten bolt by 45 Nm.
- Replace the sprocket of the tensioner, fasten the bolt with 45 Nm.
- Before installing the tensioner, press the spring and lock it.
- Loop the camshaft belt over all lower sprockets and pulleys.
- Check if engine is still in TDC position.
- Install the timing belt together with the tensioner.
- Fasten the nuts of the tensioner with 20 Nm.
- Install upper idler of timing belt and fasten it with 45 Nm.
- Install lower idler of timing belt and fasten it with 45 Nm.
- Loop the belt over the camshaft sprocket.
- Install the securing clip.
- Release the tensioner, and fasten the bolt and the nut.
- Place the sprocket for the balance belt on the crankshaft.
- Place the upper idler on the bolt.
- Place the excenter tensioner.
- Loop the balance belt over all sprockets.
- Place the pulley for the generator and fasten the bolts with 13 Nm.
- The tension should be moderate. You may rotate the belt by 135°.
- Fasten the tensioner with 45 Nm.
- Place the pulley for the power steering and the central bolt.
- Crank the engine twice.
- Lock the crankshaft with Allen key in the flywheel and fasten the central bolt with 210 Nm.
- Remove the Allen key.
- Release the tensioner once more and fix it with 20 Nm.
- Adjust the idler, so that it presses the belt up by 0 - 1 mm and the spacing below is min. 0.5 m.
Step 9 Prepare the test run
- Place the starter motor and fix it by two bolts.
- Make the electric connections.
- Insert the fan unit.
- Lock the screws, plug it in and fix the cable.
- Install hose between the radiator and water pump.
- Install the plastic housing on the water pump.
- Connect the hose from the reservoir.
- Remove the locking bolts from the camshaft sprocket.
- Install the rotor.
- Mount the cover of the camshaft sprocket.
- Install the distributor cap.
- Plug in the cables.
- Fill the cooling system.
- Close the bleed plug of the cooling system.
- Connect the battery.
- Crank engine once more as final test.
- Check all TDC-marks.
- Run the engine.
- Check the belts and all TDC marks again.
Step 10 Final steps
- Install the lower cover of the timing belt.
- Loop the drive belt over the pulleys.
- Turn pressure rod until the belt has correct tension.
- Lock the nuts - the left side has left thread.
- Tighten the pivot bolt of the generator.
- Loop the drive belt of power steering over pulleys.
- Mount the pressure rod.
- When you may press the belt to 83 mm, the tension is all right.
- Lock the nuts - the left side has left thread.
- Fasten the pivot bolt of the power steering pump.
- Install the lower part of the bumper.
- Run the engine again until the fans start running.
- Fill the cooling system up to Max.
- Check if everything is tight.
- Install the front cover of the timing belt.
- Install the lower part of the bumper.
- Mount the engine´s undercover.
- The procedure for tensioning the timing belt has to be repeated after 3000 km.
Just updated your iPhone? You'll find new emoji, enhanced security, podcast transcripts, Apple Cash virtual numbers, and other useful features. There are even new additions hidden within Safari. Find out what's new and changed on your iPhone with the iOS 17.4 update.


Be the First to Comment
Share Your Thoughts