Changing the rear disc brakes on your 2001 Chrysler Town & Country (henceforth referred to as T&C) can be quite a challenge, but if you can spare a few hours (remember that you need to budget time to get the brake parts from the parts house) and are willing to get a little dirt on your hands, then you can save quite a bit of coinage!!! If after reading this article you do not feel like you can safely change your brakes, then bring your vehicle to a repair shop and let a professional do the job. It's cheaper in the long run and your health and safety are the most important things to consider.
Remember safety first!!! Park the vehicle on a flat hard surface with the transmission in park and wedge the front tires so the vehicle will not roll.
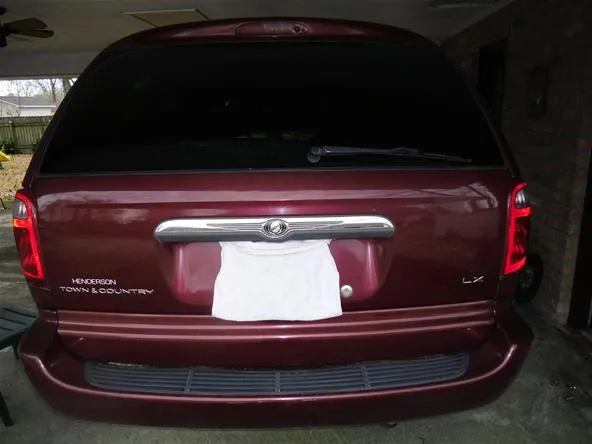
First, the rear of your minivan should look like this...

Before lifting the rear tires off the ground, loosen the lug nuts on the rear wheels 1/4 of a turn.

Using a hydraulic or mechanical jack, lift one side of the vehicle and then place a stand under the rear axle. You can repair one side at a time, but I like to lift both sides and place the axle on two stands as shown here...

Remember, safety first!!! Never work on a vehicle without having it supported by stands. Hydraulic and mechanical jacks are subject to failure that can cause sever injury or even death.
Next, finish removing the lug nuts and the hub cap (on T&C, the hub caps will not come off until the lug nuts are removed).

After removing the lug nuts and hub cap, the wheel looks like this...

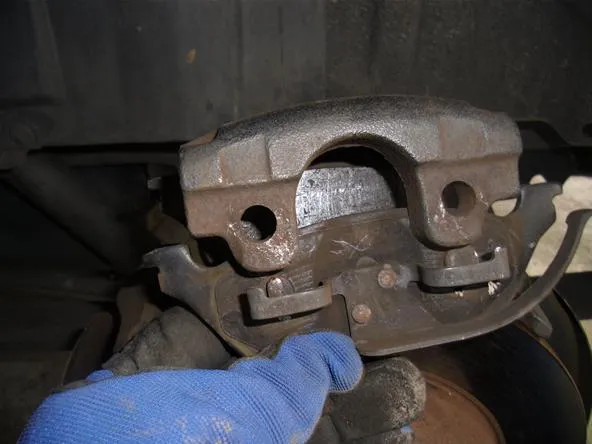
Remove the wheel and place it flat on the ground, out of your way. This is what the rear disc brake assembly looks like...

Tip
- I like to have both sides off the ground at one time, so that when I am putting the assembly back together, I can look at the opposite side if I have any questions about how a part is installed.
There are two pins that hold the brake pad assembly to the rear axle housing. Remove these using a T47 torx or star bit and a ratchet. You can use a hex wrench or bit. This is the first pin...

And this is the second pin...

Here is what the two pins look like once they are backed out far enough to remove the brake pad assembly...

Tips
- You can take the pins all the way out or leave them in the assembly. Just make sure they are backed out far enough not to interfere with reassembly.
The brake pad assembly can now be removed from the rotor. My rotor was not worn (I had replaced it the last time I changed the pads) but if you notice grooves and excessive wear, then have the rotor turned or replaced. I prefer to replace, since it restores the brake pad assembly back to original specs.

Remember, safety first!!! Never let the brake line support the weight of the brake pad assembly. Support assembly with mechanics wire.
Remove the outer pad first using two screw drivers as shown. There are two bumps on the pad back that hold pad in place. The lower screwdriver pushes the pad in while the upper screwdriver pushes the spring arm down and off the assembly.

Below shows the outer pad and the bumps that hold the pad in place. Then remove the inner pad by pulling the pad out of the piston housing.

I have laid out the old and new pads to show that the outer pad (on left) has a left and right. You can tell the difference by matching the spring arm that extends to one side of the pad. Make sure that you put back the identical outer pad that came off this side. The inner pad (on right) is identical so either pad will work, just make sure that the pad is seated all the way in the piston housing.

The last step before reassembly is to push the piston back into the brake pad assembly. First, check your brake fluid reservoir, and if it is full, then take a medicine syringe or buy a turkey baster and remove some of the brake fluid (always dispose of old fluid properly). Now take a 4-inch C-clamp and place the screw end on the outer housing and the stationary end on the piston as shown below (Photo 1). Slowly turn screw handle so that the piston is fully seated (Photo 2).

Photo 1: Seating the brake piston in the brake pad housing.

Photo 2: Piston fully seated.

Photo 1: Seating the brake piston in the brake pad housing.

Photo 2: Piston fully seated.
For reassembly, simply reverse the order of the above steps. If you need help, refer to the photos or simply look on the other side of the vehicle for a reference (if you lifted both sides at once).
A Couple of Pointers:
- Brake pads usually come in three grades. I usually use the mid-grade pads, but even buying the high-grade pads you will save money by doing it yourself.
- Remember to refill your brake reservoir if you removed some fluid and the level is low.
- Once every thing is reassembled and you start the vehicle, pump the brakes until you get a full brake pedal. Then before moving the vehicle, engage the brake fully and slowly release and apply the brake to make sure it will stop the vehicle. Once you are certain the pedal will engage the brakes, head out on the road to test at road speed.
- Pat yourself on the back as you have saved that coinage and have a quality brake job in place.


Comments
Be the first, drop a comment!