

00:00 Hey, guys, welcome to my channel. My name's Tony. In this video, I'm going to show you how to take the drive shaft out of your Jeep Wrangler. Before we get started remember, if you like the video give it a thumbs up. If you have any questions crosstalk 00:00:12 I'll reply back to you. And don't forget to subscribe to the channel and you'll be able to crosstalk 00:00:18.
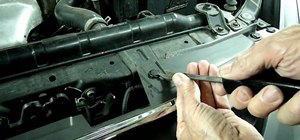
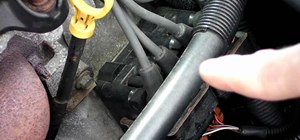
00:22 To take the drive shaft out, you're going to want a 5/16 socket, and you just put it on there if you want to crack these loose. Like that, and rotate the drive shaft around. Get them all cracked loose. And I'm actually going to hook this up to my cordless gun here, so we can speed this up. Be careful, you don't want to have these caps come off. You want to make sure those are on there nice and tight, because there's little spleens in there, you don't want to mess those up.
01:29 These should come out fairly easy. If they're stubborn, you can put some penetrating oil on them, like some PB Blast.
01:41 See, you get to a point in your life where the guy on the right's my dad, the guy on the left is one of my best friends, we grew up together in my dad's shop. The guy on the left got in a fight with a beehive, and the guy on the right just watched me work my butt off. So, let's go back to the video.
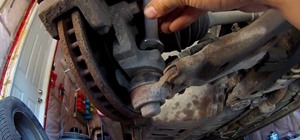
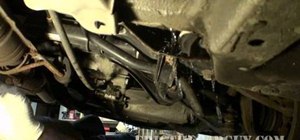
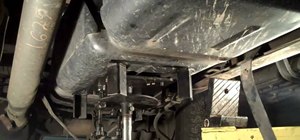
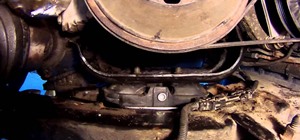
01:59 To take the driveshaft out, put your hand on the little two caps right here, you don't want them to fall off. And it just slips right out of the transfer case. Take it off, and make sure you put something underneath the snout. Or else you're going to get some fluid leak.
02:24 Now we should be ready to put the drive shaft back in. Actually, before you put the shaft back in, wipe it down and inspect this part of the shaft going in. Make sure there's no nicks on it, and that it's clean and smooth so there's no irregularities on that that are going to nick that new seal and cause a leak all over again.
02:55 This one looks pretty good to me. It's pretty smooth. There's nothing on it that I can see or feel that could cause a problem, so let's put this back in.
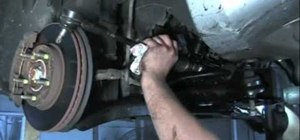
03:06 Grab your shaft and slide the end that goes into the transfer case back in. Make sure that the spine's lined up, and wiggle it a little bit. Should slide right in for you. Make sure your hands are over the caps, so that they don't come off of the U-joint. You don't want to loose them on the ground and have your bearings fall off, because that's a pain. You don't want to be doing that.
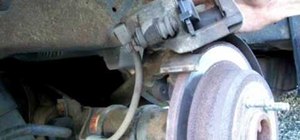
03:34 Also, this is a good time to inspect those U-joints, if they don't move around freely, if they there's some play in them, it's a good time to replace them. I'll get together with my buddy Stevo here at some point and do a video on that too.
03:50 So, those are in. Take those little clamps that came off, that hold the drive shaft to the yoke radial. Take your screws, start them by hand, you don't want to start them with the socket or anything, because you don't want to cross tie them. Start them by hand, feel them catch. There's two on this one, because it's a pretty easy driveshaft to do. inaudible 00:04:36
04:35 Grab your socket and then tighten them down a little bit. Not all the way yet. Then you're going to spin the driveshaft and catch the other ones. Just bringing down so that they start to get snug.
04:56 You're going to spin this and put this one on. Then same deal, start the screws by hand. Tighten them down.
05:38 Once you have all four screws tight, go around with the socket and sight them up. You don't really want to use the impact, or anything on these, they're pretty tiny. You don't want to snap them, because that will make your day miserable.
05:53 Just tighten down. All right, these should be good to go. Hope you guys enjoyed the video. Remember, if you have any questions, or you have a comment, like the video and don't forget to subscribe. We've got a lot of great stuff coming your way. Thanks.


Be the First to Respond
Share Your Thoughts